Panoramic Photography: Tips and Techniques
October 09, 2014
•
Leave a Comment
Introduction Photographic images come in various sizes. The popular 35mm format is 1.5x1 (width x height). Panoramic images typically have aspect ratios of 3x1 or larger, similar in size to that generated by expensive, film-based 6x17 format. Why bother with panoramic images? I find them pleasing to the eye, capturing a wider view of the landscape or cityscape and being able to print the image at large scale; see examples below.
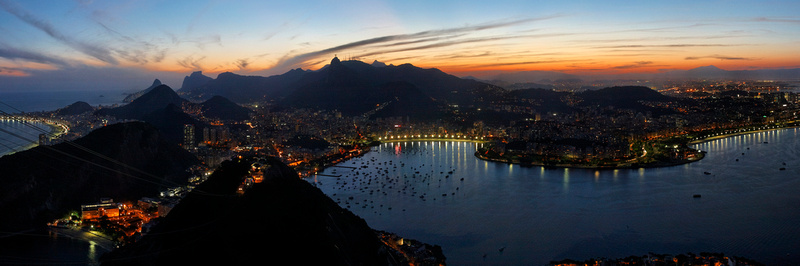
Rio de Janeiro, Brazil. This image was featured on National Geographic Traveler "Your Brazil Photos".
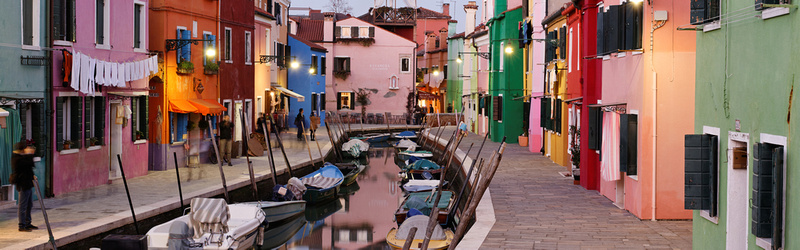
Burano at Twilight, Italy. I made a beautiful 16x48" canvas print of this pano for my living room.
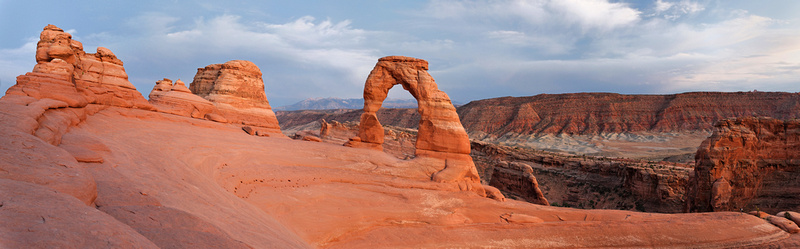
Delicate Arch, Utah
Generating Panoramic Image(s)
Not long ago, generating panoramic images used to be in the domain of those who possessed dedicated panoramic cameras (e.g. Linhof, Horseman, Fuji). They generate high-quality images that are still being in used by the aficionados.
Many newer digital cameras now have panoramic sweep modes capable of capturing panoramic images easily; however, I find the overall image quality is not the best.
Alternatively, one could simply crop a single image into a panoramic format. This will suffice for smaller prints/ sizes as you would reduce the image file resolution.
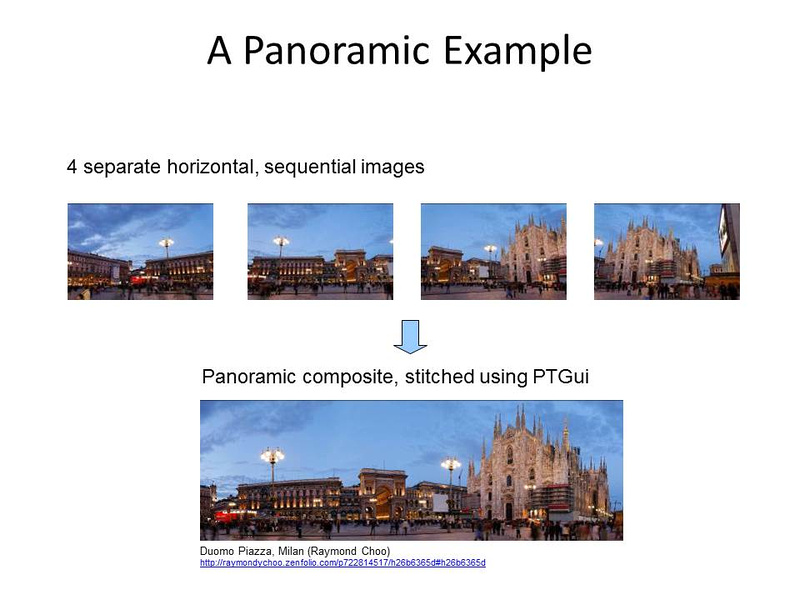
I prefer the technique of capturing separate overlapping images hand-held or even better with a tripod, and stitching them into a panoramic image. This 3-step process is relatively straight-forward (illustrated below) with some practice and a stitching software:
(1) Capturing the Sequential Images, (2) Stitching the Panoramic Image, (3) Cropping & Editing.
Step (1) Capturing the Sequential Images
This is perhaps the important step. Some tips:
Step (2) Stitching the Panoramic Image
Step (3) Final Editing
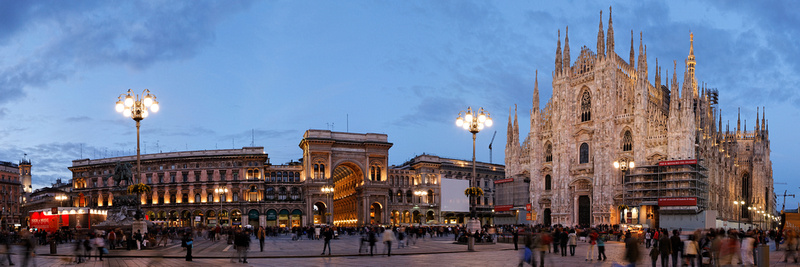
Duomo Piazza, Milan
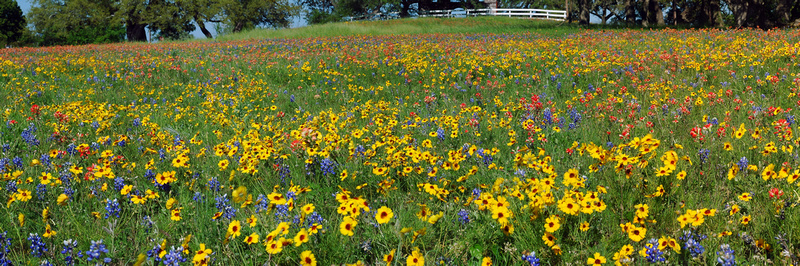
Texas Wildflowers
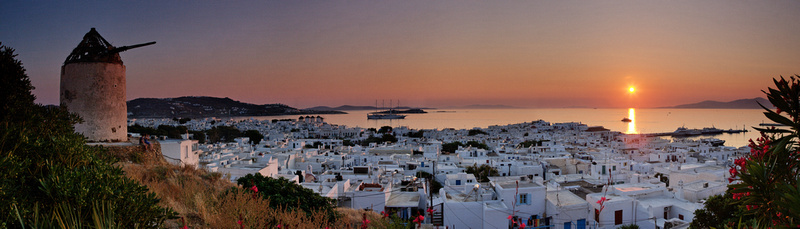
Mykonos Sunset, Greece. I used a 3-stop graduated ND filter with each of the overlapping images.
Other Considerations
I hope you enjoy capturing and creating panoramic images. You can see more panoramic images in my photo site.
Keywords:
5D,
National Geographic,
Rio de Janeiro,
arch,
architecture,
blog,
burano,
canon,
choo,
delicate,
duomo,
forum,
fujifilm,
greece,
island,
italy,
landscapes,
milan,
mykonos,
night,
panorama,
panoramic,
photography,
raymond,
roman,
rome,
stitching,
texas,
travel,
twilight,
utah,
wildflowers,
x-e1

Comments
No comments posted.
Loading...
|